How to Install a CCTV Camera at Home: Complete Setup Guide
If there’s ever a break-in or dispute at your home or shop, the first question you’ll hear from the police, your insurer, or your neighbours is almost always the same: “Why didn’t you have CCTV?”
It’s become the baseline expectation for both homes and small businesses across India, and the good news is that installing one yourself is far more achievable than most people assume.
This guide covers everything you need to know before you buy anything. The components, camera types, cabling, storage math, and a complete step-by-step installation walkthrough, plus the practical mistakes that trip up most first-time installers.
Quick Answer: What Do You Actually Need?
For a typical home, you need 3-4 cameras (main gate, front door, parking, and a rear/side entry), a 4-channel DVR or NVR, a 1-2TB hard disk, a power supply, and cabling. All of these are available as a complete kit starting around ₹10,000-15,000. A basic 4-camera installation takes 4-6 hours and is genuinely doable yourself if you’re comfortable with basic drilling and cable routing; complex multi-storey wiring is where hiring a professional starts to make more sense.
What Does CCTV Mean?
CCTV stands for Closed Circuit Television. This is a system of cameras, a recording device (DVR or NVR), and a display, all connected on a private, closed network rather than broadcast publicly.
India currently has no specific law restricting where you can install CCTV on your own private property, though public-space surveillance requires approval from local authorities.
Is Home CCTV Legal? What You Need to Know About Privacy
You’re free to install CCTV on your own private property for security purposes without any special permission. Where it gets more sensitive is coverage that extends beyond your boundary.
A camera angled into a neighbour’s window, balcony, or private yard can create a genuine privacy dispute, and under India’s Digital Personal Data Protection (DPDP) Act, 2023, that’s worth taking seriously rather than dismissing.
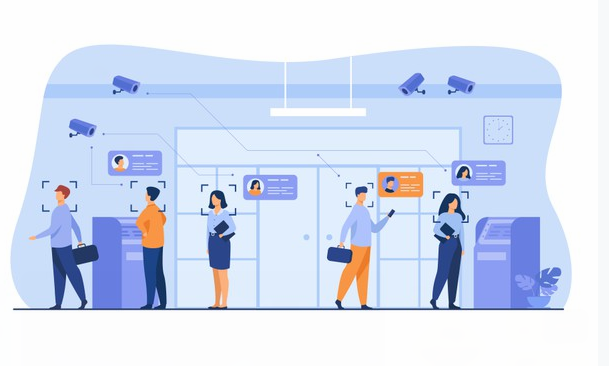
A simple “You are under CCTV surveillance” sign at your gate is good practice. It deters intruders and also gives visitors fair notice, avoiding misunderstandings about privacy.
When positioning cameras, always double-check the frame doesn’t capture a neighbour’s private space; angle it toward your own gate, wall, or driveway instead.
Important 2026 update: from 1 April 2026, CCTV cameras sold in India must meet MeitY’s Essential Requirements (ER:01) compliance standard. When buying a new system, check that the product listing confirms this, since it affects both security standards and long-term firmware support.
What Are the Requirements for CCTV Installation?
A full surveillance setup typically needs cameras, a DVR or NVR, a power supply, cabling, and a monitor. But that complete setup is only necessary once you’re running more than two cameras.
For a single room, shop counter, or small entryway, a standalone camera alone often covers your needs without any of the added complexity.
Types of CCTV Systems
Modern CCTV setups fall into a few core categories, and picking the right one depends mainly on how many cameras you need and whether you’re comfortable running cable.
1. Standalone IP Cameras
A standalone IP camera connects to the internet directly or via a network switch, wired or wirelessly, and supports remote viewing through a mobile app using peer-to-peer (P2P) technology.
These are ideal when you only need one or two cameras, such as a single shop counter, a baby monitor, or watching over domestic help.
Security tip: change the default username and password immediately after setup, since unsecured IP cameras are trivially easy to access remotely if left on factory credentials.
For curated picks across budgets, see our roundup of the best CCTV security cameras for home or office in India.
2. Cameras with Local Memory Card Storage
These standalone cameras save footage directly to a memory card (commonly up to 128GB) without needing a network connection, and many also support a direct video-out connection to a TV. They’re a budget-friendly option when you don’t need remote viewing or long-term cloud backup.
3. Multi-Camera IP Systems with NVR
Multiple IP cameras connect to a Network Video Recorder (NVR) via cables and network switches. This is a standard setup for multi-storey homes or offices needing broader coverage. Some installations combine IP and analogue cameras in a hybrid configuration depending on what each area actually needs.
4. Wi-Fi CCTV Systems
This combines wireless IP cameras with an NVR, eliminating the need for cable runs and cutting installation time significantly. The limitation is cost. Wireless cameras and NVRs are typically pricier than wired equivalents.
Wi-Fi signal often struggles to pass cleanly through RCC (reinforced concrete) walls common in Indian homes, so test signal strength at your planned camera locations before committing to a fully wireless setup.
5. Hybrid Systems (Analogue + IP)
A hybrid system runs both analogue and IP cameras on a DVR that supports both formats, giving you flexibility to mix cheaper analogue cameras in low-priority areas with higher-resolution IP cameras where it matters most.
6. Analogue Cameras with DVR
This remains the most widely installed system for larger-area surveillance, using CCTV cameras connected to a Digital Video Recorder via cable. The complete setup includes cameras, a DVR with a hard disk, a power supply (SMPS), cabling and connectors, and a monitor. We’ll cover each of these components in detail below.
Core Components Explained
Camera Types: Dome vs. Bullet
Dome cameras are compact, wall- or ceiling-mounted, and offer a wider field of view, making them well-suited to indoor spaces like living rooms, offices, and shop interiors.
Bullet cameras are tube-shaped, offer better focus and range, and are the standard choice for outdoor coverage, provided you select an IP68-rated model built to handle rain and direct sun exposure.
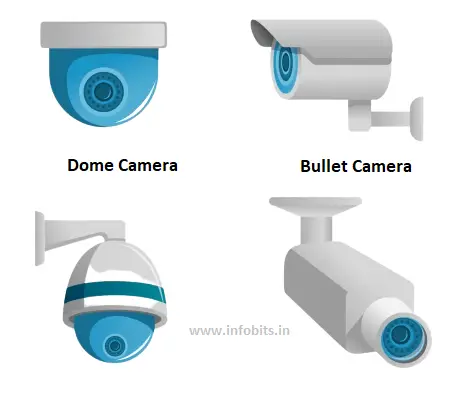
| Feature | Dome Camera | Bullet Camera |
|---|---|---|
| Best for | Indoor spaces | Outdoor areas |
| Field of view | Wider | Narrower, more focused |
| Weather resistance | Limited | Available (check IP68 rating) |
| Typical cost | Lower | Slightly higher |
| Visibility to intruders | Less obvious | More visible (can deter) |
Beyond these two, PTZ (Pan-Tilt-Zoom) cameras allow remote-controlled movement and are useful for covering large open areas, while cameras with built-in microphones add audio recording where needed.
Most cameras sold today include night vision as standard, and resolution options range from 1MP to 10MP+, with 2MP being the most common sweet spot for home use, balancing clear footage with manageable storage requirements.
DVR vs. NVR: What’s the Difference?
A DVR (Digital Video Recorder) works with analogue cameras and processes video at the recorder itself, connected via coaxial cable.
An NVR (Network Video Recorder) works with IP cameras and processes video at the camera level, generally supporting higher resolutions and more advanced features like AI-based motion analytics.
For most new installations in 2026, NVR-based IP camera systems are the preferred choice for image quality and features, though DVR analogue systems remain a reliable, lower-cost option that’s still widely supported.
Both are sold by channel count ( 4, 8, 16, and 32-channel models are standard ), and it’s worth noting there’s often little price difference between a 4-channel and 8-channel unit, so buying one size up gives you room to add cameras later without replacing the whole recorder.
Popular, well-supported brands in India include Hikvision, CP Plus, Godrej, and Dahua.
Power Supply (SMPS)
The SMPS (Switch Mode Power Supply) delivers the 12V DC power your cameras need to run, with its current rating scaling based on how many channels you’re powering.
If you’re using PoE (Power over Ethernet) IP cameras instead, this is handled through the Ethernet cable itself, which simplifies wiring considerably.
Cabling and Connectors
For analogue systems, use RG59 coaxial cable to carry the video signal alongside a separate power cable. For IP/NVR systems, Cat6 Ethernet cable carries both power (via PoE) and data through a single run, which is simpler and increasingly the standard choice for new installations.
Always invest in quality, shielded cable. Cheap cable degrades faster and causes video signal distortion, which often costs more in the long run through re-cabling.
You’ll also need BNC/RCA connectors for analogue camera connections and DC power connectors for the power supply; use proper male-female connections with weatherproofing at every joint, especially outdoors.
Hard Disk and Storage Calculation
DVRs and NVRs don’t come with a hard disk included. You’ll need to buy one separately, sized to how many days of footage you want to retain.
As a rough guide, four motion-activated cameras in a moderately active area use roughly 15-25GB per day combined, nearly doubling for continuous 24-hour recording across all channels.
| Storage Size | Approx. Retention (4 cameras, motion-triggered) | Approx. Retention (4 cameras, 24/7 recording) |
|---|---|---|
| 1TB | ~40-60 days | ~20-30 days |
| 2TB | ~80-120 days | ~40-60 days |
Use surveillance-rated hard disks rather than standard computer drives where your budget allows. They’re built for continuous read/write cycles and last considerably longer under 24/7 operation, even though they cost somewhat more upfront.
Monitor
Any computer monitor or LED TV with VGA or HDMI input works fine for local viewing. Most modern DVRs and NVRs support both connections directly.
How Many Cameras Does Your Home Actually Need?
This is one of the most common questions first-time buyers have, and the honest answer depends on your layout. But as a starting benchmark:
- 1-2 BHK apartment: 1-2 cameras (main door, one common area)
- 2-3 BHK flat: 2-4 cameras (main gate, front door, parking, balcony)
- Independent house: 4-8 cameras (all entry/exit points, boundary wall, parking, backyard)
An on-site walk-through of your property, checking sightlines from each proposed camera position, will always give you a more accurate count than a general rule of thumb.
Step-by-Step: How to Install a CCTV System
Step 1: Plan Your Camera Positions
Walk your property and identify every entry and exit point such as main gate, front door, back/side door, parking area, and any blind spots along the boundary wall. Mark these on a rough sketch before buying anything, since your final camera count and cable lengths depend entirely on this plan.
Step 2: Choose and Buy Your Kit
Complete CCTV kits ( cameras, DVR/NVR, cables, and connectors ) are widely available online starting around ₹10,000 for a basic 4-camera 1080p setup, with the hard disk typically sold separately for an additional ₹3,000-4,000.
If you’re comparing kits, look specifically for ones that list MeitY ER:01 compliance and include a surveillance-rated hard disk option. This combination tends to hold up better over years of continuous use than the cheapest bundle available.
Step 3: Position the DVR/NVR First
Choose a secure, well-ventilated, lockable location for your recorder. This should be ideally out of sight and not easily reachable, since a stolen DVR erases your entire recording history along with it. Keep it close to your internet router for a short, clean Ethernet run.
Step 4: Run Your Cabling
Drill mounting holes at each planned camera position, then route cable back to the DVR/NVR location, using conduit for any outdoor runs and leaving a short service loop at each end for future adjustments.
Keep data cabling separated from mains electrical wiring to avoid interference, and secure runs neatly with cable clips along ceiling corners or existing wiring paths.
Step 5: Mount the Cameras
Screw the mounting bracket firmly into solid masonry (not just plaster) using appropriately sized wall plugs, then attach and angle the camera to cover your intended area without obstruction.
Avoid positioning cameras where direct sunlight or headlights will hit the lens, and don’t mount them so close to an object that night-vision infrared overexposes it while leaving the rest of the frame dark.
Mounting height: keep cameras roughly within 8-12 feet, which is high enough to deter tampering, but not so high that facial recognition becomes impossible.
Step 6: Install the Hard Disk and Connect the DVR/NVR
Open the recorder, secure the hard disk using the SATA and power connectors provided (manufacturer video tutorials are widely available for specific models), then connect each camera’s video cable to its assigned input port.
Connect the SMPS power supply, matching positive and negative terminals carefully if your unit uses separate per-channel connectors.
Step 7: Power On and Configure
Connect a mouse and monitor, power on the DVR/NVR, and log in. The default is typically username admin with either admin or a blank password, though this varies by brand and should be in the manual.
Immediately set the date and time, then change the default password before doing anything else. This single step closes the most common security hole in home CCTV systems.
Step 8: Set Up Remote Viewing
Connect the DVR/NVR to your router via an Ethernet cable, then enable P2P (peer-to-peer) viewing in the network settings menu.
Download the manufacturer’s companion app (Hik-Connect, CP Plus’s app, etc.), scan the device QR code or enter the unique device ID, and you’ll be able to view all cameras remotely from your phone.
Step 9: Configure Recording Settings and Test Everything
Set your recording mode ( continuous 24-hour recording, scheduled time windows, or motion-triggered only ) based on your storage capacity and priorities, then define motion detection zones to avoid excessive false triggers from passing traffic or trees.
Finally, walk through each camera’s live feed and confirm coverage, focus, and night vision are all working as expected before considering the job done.
Common Mistakes to Avoid
- Leaving the default password unchanged: This is the single most common security failure in home CCTV, making your feed accessible to anyone who finds your device ID.
- Skipping a UPS for the recorder: A power cut mid-recording means you lose exactly the footage you’re most likely to need. A UPS (for short outages) or inverter backup (for longer ones) is a small cost against that risk.
- Using cheap, unshielded cable: It degrades faster and introduces video interference, often costing more over time through replacement than buying quality cable upfront.
- Ignoring ventilation for the DVR/NVR: These units run 24/7 and generate heat; poor airflow shortens their lifespan meaningfully.
- Pointing cameras at a neighbour’s property: Beyond the legal risk under the DPDP Act, it’s simply avoidable with careful angle planning during Step 1.
- Buying a recorder with no spare channels: If you might add cameras later, size up now. The price difference between adjacent channel counts is often small.
DIY vs. Hiring a Professional
A basic 2-4 camera Wi-Fi or plug-and-play system in a rented flat is genuinely manageable yourself, especially if you’re comfortable with basic drilling and following the app setup.
Where professional installation starts making more sense is multi-storey wired PoE setups, cable runs hidden inside finished walls, or any work involving new electrical points. That’s not the place to improvise, and licensed electrician involvement is worth the cost for anything touching your mains supply.
Professional installation typically costs ₹500-1,000 per camera for labour alone, on top of equipment costs. It is a reasonable charge if your layout involves ladder work, concealed wiring, or more than 4-5 cameras.
Advanced Features Worth Knowing About
Most DVRs and NVRs sold today include AI-powered features that go well beyond basic recording, and it’s worth exploring these rather than treating your system as a passive camera feed:
- Line-crossing alerts: Automatic alarms when someone crosses a defined boundary
- People vs. vehicle detection: Reduces false alerts from passing traffic or animals
- Footfall analytics: Useful for shop owners tracking customer visit patterns and peak hours
- Facial recognition: Available on higher-end systems, useful for known-visitor alerts
A qualified installer can help configure these properly, turning your CCTV system from a simple recorder into a genuine active security tool.
Related: Integrating Indoor Cameras Into a Smart Home Setup in India (A Practical Guide)
Frequently Asked Questions
The camera captures a continuous sequence of images, which are transmitted by cable or wirelessly to a recording device and then to a display, letting you view it as live or recorded video footage.
A DVR processes video from analogue cameras at the recorder itself via coaxial cable, while an NVR processes video from IP cameras at the camera level, generally offering higher resolution and more advanced features.
Yes, installing CCTV on your own private property is legal without special permission, though cameras should not capture a neighbour’s private space, which can raise privacy concerns under the DPDP Act.
Most 2-3 BHK homes are well covered with 2-4 cameras positioned at the main gate, front door, parking area, and balcony or rear entry.
A 1TB drive typically stores 20-60 days of footage from four cameras depending on recording mode, while a 2TB drive roughly doubles that range. Choose based on how long you want to retain footage.
Wired (PoE) systems are more reliable and unaffected by Wi-Fi interference, especially through thick RCC walls, while wireless systems are faster to install and better suited to rented homes where drilling is limited.
Power over Ethernet delivers both power and data through a single Cat6 cable to IP cameras, simplifying wiring considerably compared to running separate power and video cables.
Yes, a UPS or inverter backup ensures your system keeps recording through power cuts. Without it, you risk losing footage during exactly the kind of incident you installed CCTV to capture.
Yes, nearly all modern DVR/NVR systems support P2P remote viewing through a companion mobile app once connected to your internet router and configured with a unique device ID.
Leaving the default username and password unchanged is by far the most common vulnerability, since anyone who discovers your device ID can potentially view your feed.
Use dome cameras indoors for their wider field of view, and IP68-rated bullet cameras outdoors for better weather resistance and focused range.
A standard 4-camera home installation typically takes 4-6 hours, while larger systems for offices or commercial spaces can take a full day depending on cable routing complexity.
Basic Wi-Fi or plug-and-play systems with 2-4 cameras are manageable yourself; multi-storey wired setups, concealed wall cabling, or new electrical points are better left to a professional.
From 1 April 2026, CCTV cameras sold in India must meet MeitY’s Essential Requirements (ER:01) compliance standard, so it’s worth confirming this on the product listing before purchase.
Professional labour typically runs ₹500-1,000 per camera, on top of equipment costs, and is generally worth it for complex multi-camera wired installations.
Yes, CCTV footage is commonly accepted as evidence in India, provided it’s properly timestamped and the recording chain hasn’t been tampered with.
Roughly 8-12 feet is the sweet spot, which is high enough to deter tampering, but low enough to still capture clear facial detail.
Most modern cameras include built-in infrared night vision as standard, though positioning matters. Objects too close to the camera can overexpose under infrared and wash out the rest of the frame.
No, local recording to the DVR/NVR’s hard disk continues independently of your internet connection; only remote viewing and notifications are affected until connectivity returns.
Yes, as long as your DVR/NVR has spare channels, which is why it’s worth buying a recorder with a few extra channels beyond your current camera count.
If you found this article about how to install and things to consider when installing CCTV cameras at home or office helpful, please share it with your friends and relatives.
Also, consider following our Facebook and Twitter pages for regular updates.
Subscribe to our free newsletter so that you will get similar articles and regular updates directly in your Email.
Subscribe to be the first to learn about new information
Disclosure: If you follow our links to a retailer’s website and make a purchase, we will get an affiliate commission on some, but not all, of the items or services we promote. This will cause no price change for you.