Hard Drive Health Checkup: How to Test Your HDD or SSD Before It Fails
Your hard drive will not send you a goodbye note. One day it works. The next day, your folder refuses to open.
That is why a regular hard drive health checkup is worth your time. It takes about two minutes, costs nothing, and can protect years of photos, documents and work files.
In this guide, I will show you six ways to check hard drive health on Windows, Mac and Linux. You will also learn how to read the results, what the warning signs look like, and what to do if your drive is on its way out. Everything here works for HDDs, SSDs and external drives.
Quick answer: On Windows, open PowerShell and run
Get-PhysicalDisk. If the HealthStatus column says Healthy, your drive is not reporting problems. For a deeper look, install the free CrystalDiskInfo and check that the status says Good. If you see Caution, Warning or Bad, back up your files right away.
Here is the 60-second version:
- Right-click the Start button and open Terminal or PowerShell.
- Type
Get-PhysicalDiskand press Enter. - Read the HealthStatus column: Healthy, Warning, Unhealthy or Unknown.
- Install CrystalDiskInfo for a second opinion and read the SMART values.
- If anything looks off, copy your important files to another drive first. Then investigate.
What does “hard drive health” actually mean?
Drive health is simply how reliably your drive can read and write data. A healthy drive does both without errors. A struggling drive starts to throw errors, slow down, or lose sectors.
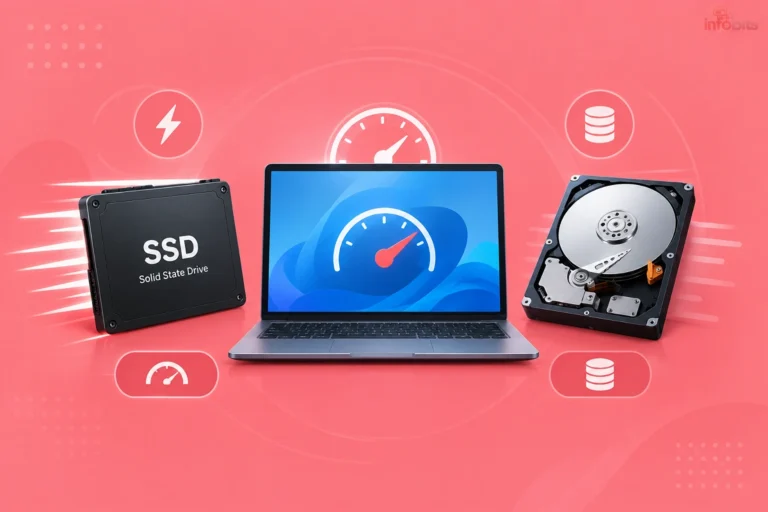
An HDD (hard disk drive) stores data on spinning magnetic platters. A tiny read/write head floats just above them. It is mechanical, so it wears out and can be damaged by shocks.
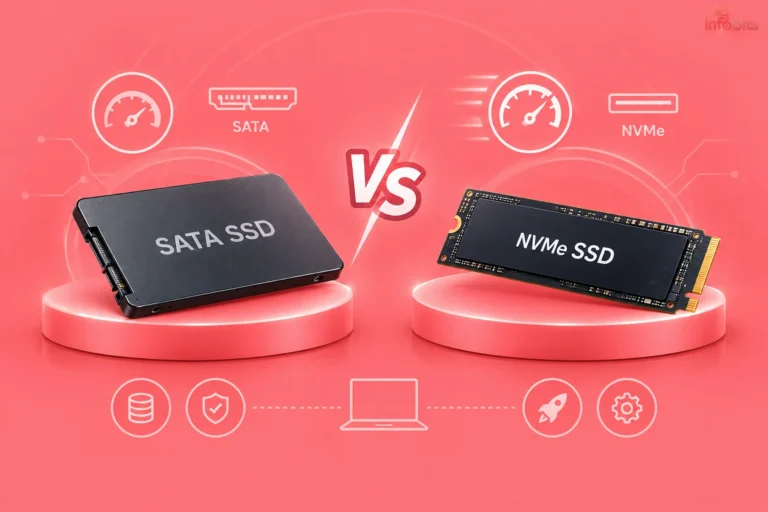
An SSD (solid-state drive) uses flash memory with no moving parts. It fails differently: its memory cells wear out with writes, or its controller stops responding.
Both types carry a built-in monitoring system called S.M.A.R.T. (Self-Monitoring, Analysis and Reporting Technology). The drive tracks its own error counters and reports them to tools like the ones below. Think of it as the drive’s own medical chart.
One important catch. A good SMART report is reassuring, but it is not a lifetime guarantee. Drives can still fail without warning, so health checks and backups go together.
Warning signs of a failing hard drive
Sometimes your drive tells you before any software does. Watch for these.
On a traditional HDD:
- Clicking, grinding, beeping or repeated “tick-tick” sounds
- Files and folders taking forever to open
- Windows freezing when you copy large files
- Copy jobs that fail halfway
- Corrupted or missing files
- The drive disappearing from File Explorer now and then
- Windows running disk-check at every startup
- Blue screens with disk-related errors
On an SSD (no noise, so look for these):
- Sudden slowdowns that were not there before
- Files turning corrupt or unreadable
- The drive going read-only
- The PC failing to boot, or not finding the drive in BIOS
- Random crashes during heavy reads or writes
- Windows warning that spare capacity is low
If you tick even two or three boxes, stop reading and copy your important files elsewhere. Come back to the tests after that.
Do this first: back up before you test
Here is my own rule. Never run a long diagnostic on a drive that holds the only copy of something precious.
Deep scans read the drive heavily. On a healthy drive, that is fine. On a weak drive, extra stress can push it over the edge.
So copy your photos, documents, and work files to a second place first. The simple version of the 3-2-1 rule works well.
This means keeping your data in three copies, on two types of storage, with one copy away from home. A cloud service helps with that last part. If you want an India-based option, see our review of DigiBoxx.
If you do not have a spare drive yet, a portable external drive such as a 1 TB or 2 TB WD Elements or Seagate Expansion is an easy way to start your backups.
Method 1: Windows 11 Settings (works for NVMe SSDs)
This is the simplest method, and it needs no software. But it has a big limit, so read the note below.
- Open Settings and click System.
- Go to Storage > Advanced storage settings > Disks & volumes.
- Select your drive and click Properties.
- Look at the Drive health section.
For supported NVMe SSDs, Windows shows estimated remaining life, available spare capacity and temperature. It can also warn you if spare capacity is low or the drive has gone read-only.
It should be clear that Microsoft’s health monitoring in Settings does not cover SATA SSDs or traditional hard drives. If you see little or no information here, do not assume your drive is fine. Move to the next method.
Method 2: PowerShell Get-PhysicalDisk (works for any drive)
This is my go-to quick check on any Windows PC. It takes under a minute.
- Right-click Start and open Terminal (Admin) or PowerShell (Admin).
- Type
Get-PhysicalDiskand press Enter. - Check the HealthStatus column.
| HealthStatus | What it means | What to do |
|---|---|---|
| Healthy | No problems reported | Keep your regular backups |
| Warning | The drive has reported an issue | Back up now, then run a second check |
| Unhealthy | The drive is likely failing | Back up immediately and plan a replacement |
| Unknown | Windows cannot read the status | Try CrystalDiskInfo or the maker’s tool |
A “Healthy” result is a good sign. It is still only a summary. For the details, use the next method.
Method 3: CrystalDiskInfo (the most useful free tool)
CrystalDiskInfo is a free tool that reads SMART data from most HDDs and SSDs, including NVMe drives. You do not need to understand every number. It gives each drive a simple status: Good, Caution, Bad or Unknown.
- Download CrystalDiskInfo from its official website. Avoid third-party download sites.
- Install it and open it.
- Look at the big status box. Use the drive buttons at the top if you have more than one drive.
- Check the temperature and the list of SMART attributes below.
For HDDs, a Caution status usually comes from three attributes: reallocated sectors, pending sectors and uncorrectable sectors. We explain these in the SMART section below.
Tip: Turn on its background monitoring option if you want a pop-up when a drive’s status changes. It is a low-effort safety net.
Method 4: The drive maker’s own tool
If CrystalDiskInfo shows Caution or Bad, confirm it with the manufacturer’s tool. These tools run deeper tests and often read the drive better than generic software.
- Seagate: SeaTools
- Western Digital: WD Dashboard
- Samsung SSDs: Samsung Magician
- Other brands: check the support page for your drive’s model number
Many Dell and HP laptops also include a hardware diagnostic you can run before Windows starts. Look for it in the startup or boot menu. It is handy when Windows will not load at all.
Method 5: CHKDSK (checks the file system, not the hardware)
People often mix this up. CHKDSK does not tell you whether the drive hardware is healthy. It checks the file system and its records for errors.
- Open Command Prompt as administrator.
- Type
chkdsk C: /fand press Enter. Replace C: with your drive letter. - Say Y if Windows offers to schedule the scan for the next restart.
The /f option fixes file-system errors. The /r option goes further: it looks for bad sectors and tries to recover readable data. It can take hours on a big drive.
Here is the key point. If CHKDSK fixes a file-system problem, the hardware is not suddenly healthy. If the same errors keep returning, the drive itself is the problem. Back up first before running /r on a drive you suspect is failing.
Need to wipe or reformat a drive after testing? Our guide to a disk format tool walks you through it.
Method 6: Mac and Linux quick checks
On a Mac:
- Open Disk Utility (Applications > Utilities).
- Select your drive and click First Aid. This checks the disk structure for errors.
- For SMART status, open System Information from the Apple menu, go to Storage, and look for the S.M.A.R.T. status of supported drives.
On Linux: install smartmontools, then run sudo smartctl -H /dev/sda for a quick pass/fail. Use sudo smartctl -a /dev/sda for the full attribute list. Swap sda with your own device name.
An old tip you should skip: WMIC
Many older guides tell you to type wmic diskdrive get status in Command Prompt. That advice is outdated. WMIC has been removed from currently supported versions of Windows 11, so the command may simply fail.
Use Get-PhysicalDisk in PowerShell instead. It does the same job and is supported.
Which method should you use?
| Method | Cost | Works on HDD | Works on SSD | Best for |
|---|---|---|---|---|
| Windows 11 Settings | Free | No | NVMe only | Quick look at NVMe SSD life |
| PowerShell Get-PhysicalDisk | Free | Yes | Yes | Fast pass/fail check |
| CrystalDiskInfo | Free | Yes | Yes | Reading SMART details |
| Maker’s tool (SeaTools, WD Dashboard, Samsung Magician) | Free | Yes | Yes | Confirming a Caution result |
| CHKDSK | Free | Yes | Yes | File-system errors and bad sectors |
| Mac Disk Utility / smartctl | Free | Yes | Yes | Mac and Linux users |
My suggestion is to use PowerShell plus CrystalDiskInfo as your regular pair. Bring in the maker’s tool only when something looks wrong.
How to read SMART data without a degree
Open CrystalDiskInfo and you will see a long list of attributes. Most of them are noise. A few really matter.
Backblaze, the cloud backup company that monitors tens of thousands of drives, tracks five SMART attributes closely. They are the ones to look at first.
| ID | Attribute | Plain-English meaning | Why it matters |
|---|---|---|---|
| 5 | Reallocated Sectors Count | The drive found bad sectors and moved data to spare ones | A rising count means the surface is wearing out |
| 187 | Reported Uncorrectable Errors | Errors the drive could not fix on its own | Backblaze flags a drive for replacement once this goes above zero |
| 188 | Command Timeout | The drive did not respond in time | Can point to the drive, but also to a bad cable or power issue |
| 197 | Current Pending Sector Count | Unstable sectors waiting to be remapped | A warning that more bad sectors may be coming |
| 198 | Uncorrectable Sector Count | Sectors that could not be read or corrected | A strong sign of real damage |
How to use this: if all five show zero, the drive is very likely in good shape. If any of them is above zero and the number keeps climbing, back up and start planning a replacement. A rising trend matters more than one single reading.
Two cautions. First, not every manufacturer reports every attribute, and the numbers are not always consistent between brands. Second, SMART is not a crystal ball. In Backblaze’s own data, about one in four failed drives (23.3%) had shown none of those warning stats.
For NVMe SSDs, look at different fields: Percentage Used (how much of the rated life is gone), Available Spare (reserve memory left) and Media and Data Integrity Errors. Low spare capacity or a rising error count is your cue to back up and replace.
What to do after you get your result
| What you see | What it likely means | What to do |
|---|---|---|
| Good / Healthy, no symptoms | Drive is fine for now | Keep your regular backups. Check again in a month |
| Good / Healthy, but you see symptoms | Could be a cable, port, driver or file-system problem | Back up, run CHKDSK, try another cable or port, check again |
| Caution / Warning | Early signs of wear or damage | Back up today. Confirm with the maker’s tool. Plan to replace it within weeks |
| Bad / Unhealthy | The drive is failing | Back up what you can right now. Replace the drive |
| Not detected, or clicking sounds | Possible mechanical or controller failure | Power off. Stop using it. Talk to a recovery professional |
Checking an external hard drive
Before you blame the drive, blame the cable. In my experience, most “dead” external drives turn out to be a tired cable, a weak USB port, or not enough power.
Try this order:
- Plug the drive straight into a USB port on the PC. Skip hubs and extension cables.
- Swap the cable for another one.
- Try a different port, and then a different computer.
- Run
Get-PhysicalDiskor CrystalDiskInfo with the drive connected.
Some USB enclosures hide SMART data from software, so a blank reading does not always mean trouble. A short, good-quality USB 3.0 cable costs very little and rules out the most common cause.
Also, always use Safely Remove Hardware before unplugging. Pulling the cable mid-write is a classic way to corrupt a file system.
Why Indian conditions are tough on hard drives
Hard drives here live a harder life than the spec sheet assumes. Four things cause most of the damage.
Power cuts and voltage swings. A sudden shutdown while a drive is writing can corrupt files. For HDDs, the heads may also park roughly. The surge when power returns can hurt too.
Heat. Summer rooms, closed cupboards and laptops on beds all push drive temperatures up. CrystalDiskInfo shows the live temperature. As a rough rule of thumb, an HDD that regularly runs in the mid-40s °C or higher deserves better airflow.
Humidity and dust. Coastal and monsoon weather is hard on electronics. Keep the PC away from damp walls and clean dust from vents regularly.
Movement. Moving a laptop with a spinning HDD, or knocking an external drive off a desk, is a leading cause of hard drive head damage.
A good surge-protected power strip is the cheapest protection for your desktop and external drives. See our guide to surge protectors for what to look for. For desktops, a small UPS gives you time to shut down properly during a power cut.
How often should you check?
| Situation | How often |
|---|---|
| Daily-use PC or laptop with a drive under 3 years old | Once a month |
| Drive older than 3 years | Every two weeks |
| External backup drive | Before important backups, and once every quarter |
| After a power surge, a drop, or a Windows disk warning | Straight away |
Here is a habit I recommend. Take a screenshot of CrystalDiskInfo each time you check. Later you can compare, and a slow climb in a SMART number is easy to spot.
Common mistakes to avoid
- Treating “Healthy” as a guarantee. It is a status, not a promise.
- Relying on CHKDSK alone. It checks the file system, not the hardware.
- Keeping the backup on the same drive. A second folder on the same disk is not a backup.
- Ignoring weird noises. Clicking means act now, not wait and see.
- Using old-style defrag tools on an SSD. Windows already handles SSD optimisation. Extra tools just add wear.
- Installing shady “PC cleaner” tools. Some fake disk checkers show scary red alerts and then ask for payment. Stick to trusted tools and read our guide on computer viruses and their types.
- Writing new files to a drive you want to recover data from. New writes can overwrite what you are trying to save.
Myth vs fact
| Myth | Fact |
|---|---|
| SSDs never fail | They have no moving parts, but memory cells wear out, and controllers can fail |
| If SMART says Good, the drive is safe forever | SMART catches many failures, not all of them |
| CHKDSK can repair a dying drive | It fixes file-system errors, not worn hardware |
| Formatting repairs a failing drive | Formatting cannot fix physical damage |
| Putting a dead drive in the freezer revives it | Recovery experts advise against it. It can make the damage worse |
| A clicking drive means all data is gone | Not always. A professional can often recover data if you stop using the drive. |
Expert tips
- Look at trends, not single readings. A number that keeps rising tells you more than one snapshot.
- Write down the serial number and purchase date. Check warranty on the manufacturer’s website. A failing drive may be replaceable for free.
- Let your drive breathe. Keep vents clear. Do not stack hot devices on top of an external drive.
- Shut down properly. Avoid holding the power button on a running desktop unless you have to.
- Replace the system drive first. If your boot drive shows Caution, move it up your list. A fresh Windows install is easier than rescuing a half-working one.
When to stop DIY and call a professional
Switch the drive off and get expert help if any of these is true:
- It makes clicking, grinding, scraping or beeping sounds.
- It is not detected in BIOS or Disk Management, even on another computer.
- It holds irreplaceable data and shows Caution or Bad.
Do not open the drive, do not tap it, do not put it in the freezer, and do not keep running recovery software on a physically failing disk. Each attempt can cause more harm.
What does it cost in India? It depends on the problem. Software recovery for deleted or formatted files is the cheapest. Physical recovery in a cleanroom can cost anywhere from several thousand to tens of thousands of rupees, depending on the lab and the damage. Always ask for a free diagnosis and a written quote first, and ask about a “no data, no fee” policy.
If you only deleted files by accident and the drive is healthy, our guide to recovering shift-deleted files may be all you need.
When to replace your drive, and what to buy
If your drive shows Caution or Bad, replace it. Do not wait for a dramatic failure.
| Your need | Better choice | Why |
|---|---|---|
| Windows and everyday apps | SSD (SATA or NVMe) | Faster boot and app loading, no moving parts |
| Big photo and video archive | HDD for storage, plus a second copy | Lower cost per terabyte |
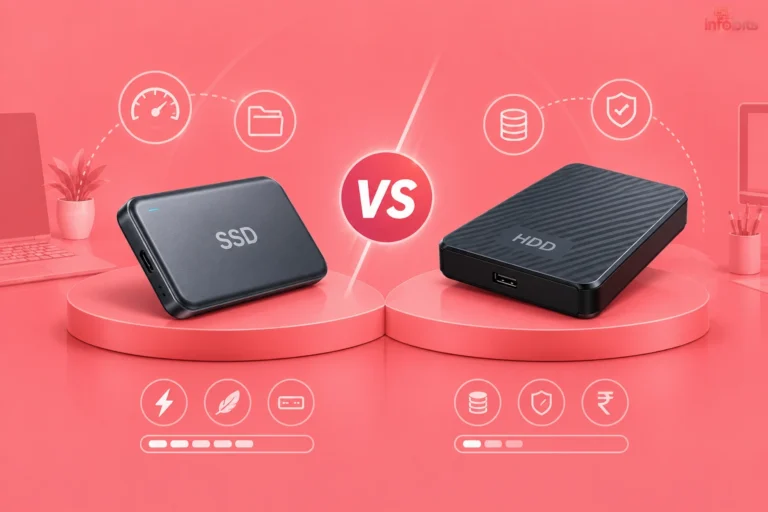
| Carrying data around often | Portable SSD | Handles bumps better than a spinning HDD |
| Old laptop with an HDD | Upgrade to an SSD | Often the biggest speed boost you can give it |
For an older laptop, a 512 GB or 1 TB SATA SSD from a trusted brand like Crucial (see on Amazon) can make it feel new again. You can also reuse the old drive as a spare backup with a USB-to-SATA adapter or a 2.5-inch enclosure, but only if it still passes your health checks.
After the swap, you will need a fresh install or a clone. Our guide to installing Windows from a USB drive covers the install, and our guide to what to do after installing Windows 11 helps you set things up.
Conclusion
A hard drive health checkup is a small habit with a big payoff. Run Get-PhysicalDisk for a fast answer, use CrystalDiskInfo for the details, and bring in the maker’s tool if something looks off.
Remember the two rules that matter most. A good result is not a guarantee, and a backup is the only real protection. Check your drive this week, set a monthly reminder, and your future self will thank you.
Frequently asked questions
Open PowerShell and run Get-PhysicalDisk, then read the HealthStatus column. For NVMe SSDs, you can also go to Settings > System > Storage > Advanced storage settings > Disks & volumes > Properties. For more detail, use CrystalDiskInfo.
CrystalDiskInfo is the easiest free option. It reads SMART data from most HDDs and SSDs and shows a simple Good, Caution or Bad status. Confirm any warning with the maker’s own tool, such as SeaTools or Samsung Magician.
You can run CHKDSK from Command Prompt to scan for file-system errors. The old wmic diskdrive get status command is no longer reliable because WMIC has been removed from the currently supported Windows 11. Use PowerShell’s Get-PhysicalDisk for health status instead.
For NVMe SSDs, Windows 11 Settings shows remaining life, spare capacity and temperature. For other SSDs, use CrystalDiskInfo or the maker’s tool, such as Samsung Magician. Look at the percentage used, available spare and media errors.
SMART stands for Self-Monitoring, Analysis and Reporting Technology. It is a monitoring system built into HDDs and SSDs. The drive tracks its own error counters, and tools read them to give you a health status. It helps you spot trouble early, but it cannot catch every failure.
No. CHKDSK checks the file system, and with the /r option, it also looks for bad sectors. But it does not read the drive’s SMART health data. Use it together with PowerShell and CrystalDiskInfo.
Look for clicking or grinding noises, very slow file access, freezes, corrupted files, failed copies, a drive that keeps disappearing, and frequent disk-error screens. SSDs make no noise, so watch for read-only mode, boot failures and sudden slowdowns.
Many drives last around three to five years of regular use, and some go much longer. Heat, power cuts, shocks and heavy use shorten their life. Age alone is not a verdict, so check health regularly and keep backups.
Yes. SMART catches many failures, but not all of them. In Backblaze’s data, 23.3% of failed drives had shown no warning in the SMART stats the company tracks. A Good status is reassuring, not a promise.
A quick PowerShell or CrystalDiskInfo check once a month is enough for most people. Check more often if the drive is over three years old. Check right away after a power surge, a drop or any warning sign.
You can fix file-system errors with CHKDSK, but software cannot repair worn-out hardware. If SMART shows Caution or Bad, back up your data and replace the drive.
Not always. Clicking often points to a head or mechanical problem, and a professional lab can often recover the data. Switch the drive off straight away, because every extra spin can damage the platters further.
Connect it directly to your PC, then run Get-PhysicalDisk or CrystalDiskInfo. Some USB enclosures hide SMART data. If the drive misbehaves, try another cable, port or computer before blaming the drive.
Open Disk Utility and run First Aid to check the disk structure. For SMART status, open System Information from the Apple menu and look under Storage for supported drives.
Yes. chkdsk /f is generally safe on an SSD because it only fixes file-system errors. The /r scan reads the whole drive, which is rarely needed on an SSD. Back up first if you suspect trouble.
Back up today, then confirm the warning with the maker’s tool. If the Caution status stays, or the SMART numbers keep rising, replace the drive. Do not wait for it to fail.
It depends on the failure. Software recovery for deleted or formatted files is the cheapest. Physical recovery for clicking or undetected drives often needs a cleanroom and can cost several thousand to tens of thousands of rupees. Ask for a free diagnosis and a written quote first.
We hope you are interested in our articles and consider following our Facebook, Instagram, and Twitter pages for regular updates.
Also, share this article with your friends and relatives. Bookmark this page for future reference.
Subscribe to our free newsletter to get similar articles and regular updates directly in your Email Inbox.
Subscribe to be the first to learn about new information
Disclosure: If you follow our links to a retailer’s website and make a purchase, we will get an affiliate commission on some, but not all, of the items or services we promote. This will cause no price change for you.