
How to Convert a Normal Inverter to a Solar Inverter (2026 Guide)
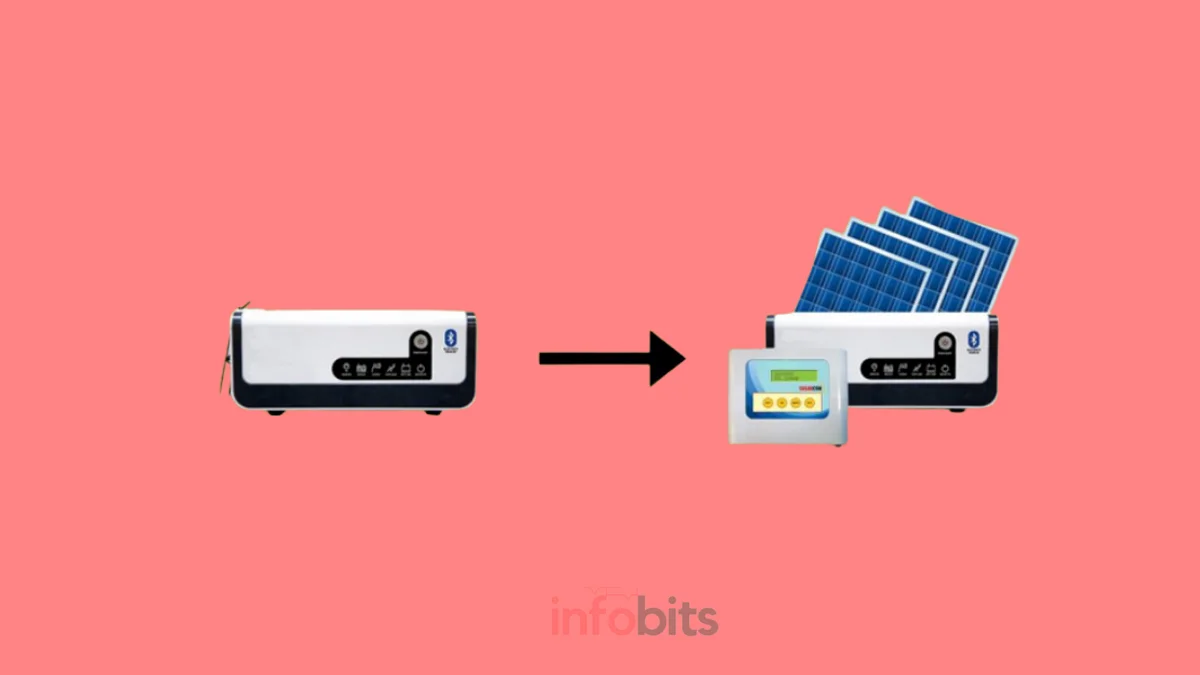
If you already own a working inverter and battery, you don’t need to throw them out to start using solar power. A solar charge controller, sometimes sold as a “solar conversion kit” or “retrofit controller,” lets you add solar panels to your existing setup and start cutting your electricity bill within days, not months.
This guide walks through exactly what a conversion involves: the components you need, how to size them correctly for your existing battery, and the actual wiring steps, along with the safety precautions and common mistakes to avoid.
Quick answer: To convert a normal inverter to a solar inverter, add two components to your existing inverter-battery system: solar panels and a solar charge controller (PWM or MPPT). For a typical 12V, 150 Ah battery setup, two 12V/350W monocrystalline panels with a 30-40A MPPT controller is a common, well-matched combination.
Normal Inverter vs Solar Inverter vs Hybrid Inverter
A standalone (normal) inverter does one job: it converts DC power stored in a battery into AC power for your home, and the battery itself is charged only from the grid. It has no way of accepting DC input from solar panels on its own.
A pure solar inverter replaces the grid-charging path with DC power fed directly from solar panels, and is mostly used in on-grid solar systems that feed excess power back to the utility.
What most Indian households actually buy, and what most “solar inverters” sold in the market really are, is a hybrid inverter. It combines both worlds: a battery, a solar panel input, and a built-in charge controller, so it can draw power from either source depending on availability.
Related reading: What Is an Inverter and How Does It Work?
Why Convert Instead of Buying a New Solar Inverter?
If your current inverter and battery still work fine, replacing the whole system just to add solar is unnecessary spending. A conversion kit lets you keep your existing inverter and battery and simply add the two missing pieces ( panels and a charge controller) to start generating and using solar power.
This approach is significantly cheaper than a full hybrid inverter replacement, and it’s reversible: if you move house or upgrade later, the panels and controller can usually be reused with a new system too.
What You’ll Need for the Conversion
Beyond your existing battery and inverter, a conversion requires just two additional components:
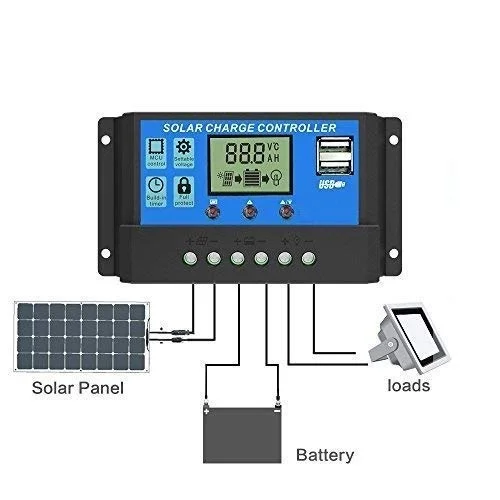
- Solar panels – sized to match your battery voltage and daily charging needs
- Solar charge controller – either PWM or MPPT, matched to your battery voltage and charging current
That’s the complete parts list. Everything else ( wiring, mounting brackets, and connectors) is standard installation hardware.
Understanding the Solar Charge Controller
Sunlight intensity changes constantly through the day, which means the DC voltage coming out of a solar panel fluctuates just as constantly. Feeding that raw, fluctuating voltage directly into a battery would damage it over time.
The solar charge controller sits between the panels and the battery, converting that fluctuating input into a steady, safe charging voltage. It also protects the battery from overcharging and prevents current from flowing backward from the battery into the panels at night.
Modern controllers go further. Many like the Ashapower Charge controller (available on Amazon)now manage the entire charging logic automatically, deciding in real time whether to draw from solar, from grid power, or from the battery itself, based on what’s available and most efficient at that moment.
PWM vs MPPT Charge Controllers
There are two main technologies used in solar charge controllers, and picking the right one matters for both cost and long-term efficiency.
| Factor | PWM Controller | MPPT Controller |
|---|---|---|
| Panel voltage requirement | Must match battery voltage | Can be higher than battery voltage |
| Best suited for | Small systems, under 2kW | Larger systems, above 2kW |
| Power conversion efficiency | ~75-80% typically | ~93-97% typically |
| Charging current range | Up to 60A | Up to 120A |
| Charging stages | 3-stage (bulk, absorption, float) | Multi-stage, adaptive |
| Relative cost | Lower | Higher |
For most home retrofit conversions, MPPT is the better long-term choice despite its higher upfront cost, because it extracts significantly more usable power from the same panels.
Especially useful on cloudy days or with panels that aren’t perfectly angled toward the sun. If budget is tight and your system is small, a PWM controller is still a workable, cost-effective option.
Step-by-Step: How to Convert Your Inverter to Solar
- Assess your existing system. Note your inverter’s VA rating, battery voltage (12V or 24V), and Ah capacity. These numbers determine everything else you’ll buy.
- Choose your charge controller. Match its voltage rating to your battery, and pick MPPT if your budget allows.
- Select solar panels sized to your battery’s charging requirement (see the sizing section below).
- Mount the panels on your rooftop or another location with maximum daily sun exposure, using a secure mounting structure angled for your latitude.
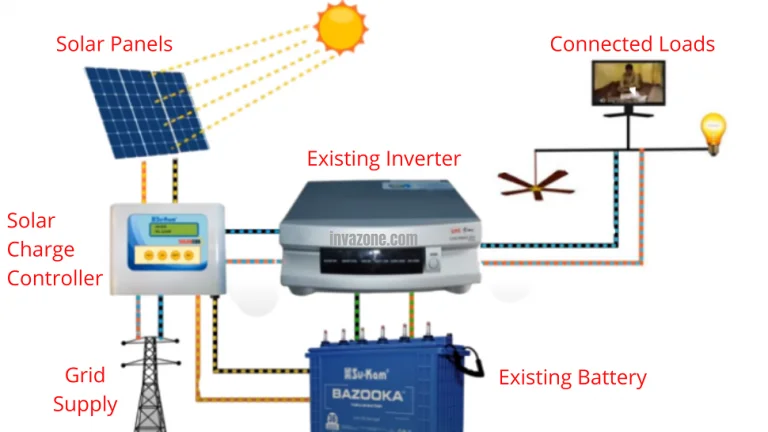
- Wire the panels to the charge controller, following the controller’s input specifications and polarity markings exactly.
- Connect the charge controller to your battery, ensuring the voltage and current ratings match your battery’s charging tolerance.
- Verify the inverter remains connected to the battery as before – the inverter itself typically doesn’t need rewiring, since it continues drawing from the same battery, which is now charged by both solar and grid.
- Test the full system – confirm the controller shows the battery charging from solar during daylight, and that the inverter still switches over correctly during a grid outage.
Warning: Working with battery and inverter wiring carries a real risk of electrical shock and short-circuit damage. Unless you’re confident in electrical work, get a licensed electrician to carry out steps 5-7.
Sizing Solar Panels to Your Existing Battery
Most homes run a 12V, 150-165 Ah lead-acid battery paired with an 800-1250 VA inverter. For a system like this, 400-500 watts of solar panels is a well-matched addition. Larger 24V systems (two batteries in series) can support higher-capacity panels.
Worked example: A 12V, 150 Ah battery charging over 10 hours needs roughly 15A of charging current. Two 350W, 12V panels connected in parallel deliver close to that current, making a 2 × 350W panel setup a solid match for this battery size.
| Solar Panel Wattage | Typical Current Output |
|---|---|
| 10W | ~1A |
| 20W | ~2.5A |
| 180W | ~9.5A |
| 350W | ~9.6A |
| 440W | ~10.5A |
Solar panel voltage should always match your battery voltage when using a PWM controller. A12V battery pairs with 12V panels. This restriction doesn’t apply with MPPT controllers, which can accept higher panel voltages and step them down efficiently.
For panel type, monocrystalline or Mono PERC panels are generally worth the slightly higher price over polycrystalline, since they deliver more power per square foot of roof space. A meaningful advantage if your rooftop area is limited.
Related reading: How Do You Choose the Best Solar Panels in India?
Checking Your Battery Is Solar-Ready
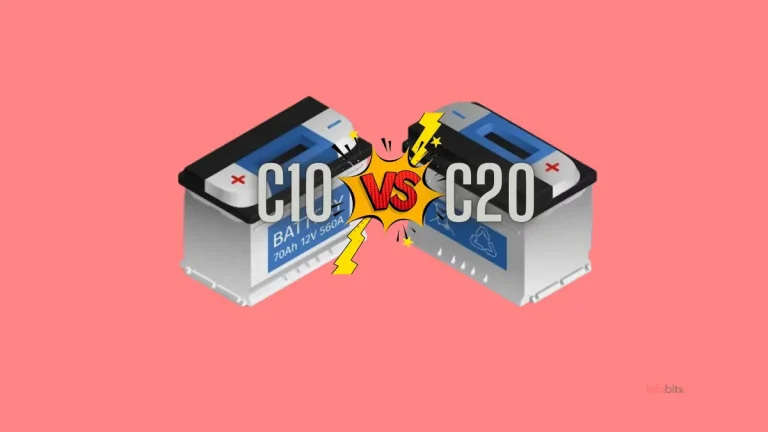
Not every battery with the same voltage and Ah rating performs identically under solar charging. One factor worth checking specifically is the battery’s C rating ( typically 5C, 10C, or 20C ), which indicates how fast it can safely charge and discharge.
Most standard domestic inverter batteries are 20C-rated. A 10C battery of the same 150 Ah capacity can be safely charged and discharged at roughly 15A, cutting charging time noticeably compared to a 20C battery.
For solar applications or homes with frequent outages, a C10 (or better) battery is the more practical choice, since it charges faster and copes better with the variable current a solar setup produces.
Related reading: How to Select the Right Inverter and Battery for Home in India?
Estimated Cost of a Conversion Kit in 2026
Prices vary by brand, panel wattage, and controller type, so treat these as ballpark figures to budget against rather than exact quotes.
| Component | Approximate Price Range (2026) |
|---|---|
| 350W monocrystalline solar panel (each) | ₹8,000 – ₹12,000 |
| 30-40A MPPT charge controller | ₹4,000 – ₹9,000 |
| 20-30A PWM charge controller | ₹1,500 – ₹3,500 |
| Mounting structure + cabling | ₹2,000 – ₹5,000 |
| Typical total (2-panel MPPT setup) | ₹22,000 – ₹35,000 |
Comparing exact current prices for monocrystalline panels and MPPT controllers side-by-side on Amazon before buying is worth the ten minutes it takes. Pricing on solar components has moved quite a bit even over the past year, and small differences per panel add up fast across a multi-panel setup.
Retrofit Smart Controllers: The Newer, Simpler Option
Since the original version of this guide was written, a newer category of plug-and-play retrofit controllers has entered the Indian market from brands like Luminous and newer players. These are designed specifically to sit between your existing inverter, battery, and new solar panels without requiring you to rewire or replace anything else.
The appeal is straightforward: no need to touch your existing inverter’s internal wiring, faster installation, and often a wider compatible battery voltage range (some support anywhere from 12V to 120V). They typically cost more than a basic PWM or MPPT controller bought separately, but the simplified installation can be worth it if you’d rather avoid a full rewiring job.
Does PM Surya Ghar Subsidy Apply to This Conversion?
This is a common point of confusion, so it’s worth being direct about it: the retrofit conversion described in this guide ( adding panels and a charge controller to an existing off-grid inverter ) is generally not eligible for the PM Surya Ghar Muft Bijli Yojana subsidy.
That scheme provides a central subsidy of up to ₹78,000, but it specifically applies to grid-connected, net-metered rooftop solar systems installed through an empanelled vendor using MNRE ALMM-listed equipment, with DISCOM approval and commissioning. A standard off-grid battery-charging retrofit doesn’t go through net metering and typically won’t qualify.
If claiming the subsidy is a priority for you, you’d need to install a proper grid-tied (on-grid or hybrid) system through a DISCOM-empanelled vendor rather than a simple retrofit kit. That’s a different project with different equipment requirements, and it’s worth checking the current eligibility rules on the official portal, pmsuryaghar.gov.in, before you commit either way.
Common Mistakes During Conversion
- Mismatching panel voltage and battery voltage when using a PWM controller, which prevents proper charging or damages the controller.
- Undersizing the charge controller’s current rating relative to the panels’ maximum output, which can overheat the controller.
- Skipping the battery C-rating check, leading to slower charging and reduced battery lifespan under variable solar input.
- Poor panel placement – partial shading on even one panel in a series string can disproportionately cut the whole array’s output.
- DIY wiring without proper insulation or circuit protection, creating a real fire or shock risk.
- Assuming any retrofit automatically qualifies for government subsidy without checking the specific PM Surya Ghar eligibility criteria first.
Safety Precautions
- Always de-energise the system (disconnect the battery) before starting any wiring work.
- Use appropriately rated fuses or circuit breakers between the panels, controller, and battery.
- Ensure all outdoor wiring and panel mounts are weatherproofed and securely earthed.
- Never work on the system during rain or wet conditions.
- If in doubt at any step, hire a licensed electrician rather than improvising. The cost of a professional install is small compared to the cost of damaged equipment or an electrical accident.
Myth vs Fact
Myth: Any inverter can be converted to solar with the right panels. Fact: The inverter itself doesn’t need modification in most retrofit setups. It’s the charge controller and battery that actually interface with the solar panels, so nearly any working inverter-battery combination can support a retrofit.
Myth: MPPT controllers are always worth the extra cost. Fact: For very small systems (under 1kW) with well-matched panel and battery voltages, a PWM controller can be perfectly adequate and considerably cheaper.
Myth: Adding solar panels means you’re eligible for the government subsidy. Fact: The PM Surya Ghar subsidy applies specifically to grid-tied, net-metered installations through empanelled vendors. A standard off-grid retrofit typically doesn’t qualify.
Myth: More solar panels always means faster charging. Fact: Charging speed is capped by your charge controller’s current rating and your battery’s safe charging current. Oversized panels beyond that limit don’t add proportional benefit.
Retrofit Conversion vs Buying a New Hybrid Inverter: Decision Guide
- Your existing inverter and battery are working well and under 2-3 years old: A retrofit conversion is the more cost-effective path. Add panels and a charge controller rather than replacing the whole system.
- Your inverter or battery is old or already needs replacement anyway: Consider buying a new solar hybrid inverter outright, since you’re replacing equipment either way.
- You want to claim the PM Surya Ghar subsidy: A retrofit generally won’t qualify. You’ll need a proper grid-tied installation through an empanelled vendor.
- You want the simplest possible installation with minimal rewiring: Look at a plug-and-play retrofit smart controller rather than a separate PWM/MPPT setup.
- Your rooftop space is limited: Prioritise monocrystalline or Mono PERC panels for higher output per square foot.
Troubleshooting Common Issues
Battery isn’t charging from solar panels during daylight: Check the charge controller’s display for panel voltage readings first. A reading of zero usually points to a loose or reversed panel connection rather than a controller fault.
Charge controller shows an overload or fault warning: This typically means the connected panel wattage exceeds the controller’s rated capacity. Verify your panel wattage against the controller’s maximum input rating.
Inverter doesn’t seem to benefit from solar charging at all: Confirm the charge controller is wired to the same battery bank the inverter draws from, not a separate or disconnected battery.
Charging is slower than expected on sunny days: Check for partial shading on the panels, dust buildup on the panel surface, or a battery C-rating mismatch limiting the safe charging current.
Conclusion
Converting an existing inverter to solar isn’t a full system overhaul. It’s the addition of two components, sized correctly to your current battery, wired in by someone who knows what they’re doing.
Get the panel-to-battery voltage matching right, choose MPPT if your budget allows it, and don’t assume this kind of retrofit automatically qualifies for the PM Surya Ghar subsidy, since that scheme is built around grid-tied installations specifically.
If you’re planning a conversion for your own home and want help matching components to your exact inverter and battery specs, feel free to share those details, and we’ll point you in the right direction.
Frequently Asked Questions
Yes, a solar battery can be connected to a regular inverter. However, the battery capacity should be as specified by the inverter manufacturer.
No. Not all inverters can be used as a solar inverter. To use it as a solar inverter, you must use a dedicated solar inverter or convert an existing inverter to solar.
Not directly. A normal inverter has no way to accept solar panel input on its own, but adding a solar charge controller and panels effectively converts the whole system to run on solar.
Yes, as long as you add a compatible solar charge controller sized to your battery voltage and the panels’ output, which handles the safe transfer of solar power to your battery.
Yes, by adding solar panels and a solar charge controller to your existing inverter-battery system, without needing to replace the inverter itself.
A pure solar inverter draws only from solar panels and is mainly used in grid-tied systems, while a hybrid inverter ( what most Indian homes actually use) can draw from solar, battery, or grid power depending on availability.
Not necessarily, though it’s worth checking your battery’s C rating. A C10 or better battery handles solar charging more efficiently than the more common C20 batteries used in standard setups.
MPPT is generally the better choice for most home conversions due to its higher efficiency, though PWM remains a cost-effective option for smaller systems where panel and battery voltage already match.
Two 12V, 350W monocrystalline panels connected in parallel is a commonly used, well-matched setup for a standard 12V, 150 Ah battery.
Generally no. The subsidy applies to grid-connected, net-metered installations through empanelled vendors, while a standard off-grid retrofit conversion typically doesn’t qualify.
Basic panel mounting can often be DIY, but wiring the charge controller and battery connections carries real electrical risk and is best handled by a licensed electrician.
A straightforward retrofit with 2-3 panels typically takes a single day for an experienced electrician, including mounting, wiring, and testing.
No. Connecting panels directly can expose your battery to unregulated, fluctuating voltage that risks damaging it, which is exactly what the charge controller is designed to prevent.
A basic two-panel MPPT conversion kit typically costs between ₹22,000 and ₹35,000 in 2026, depending on panel wattage, controller type, and installation complexity.
Not entirely for most off-grid retrofit setups. They reduce how much grid power your battery needs during the day, but a retrofit system isn’t designed to export excess power back to the grid the way a net-metered system is.
This varies by manufacturer, so it’s worth checking your inverter’s warranty terms specifically, though in most cases adding an external charge controller and panels doesn’t void the inverter’s own warranty since it isn’t internally modified.
Yes, polycrystalline panels work fine and cost less, though monocrystalline or Mono PERC panels deliver more power per square foot, which matters more if your rooftop space is limited.
Match the controller’s voltage rating to your battery and ensure its maximum current rating comfortably exceeds your panels’ total output current, typically with some margin for safety.
Many newer retrofit smart controllers support a wide voltage range, sometimes 12V to 120V, but always confirm compatibility with your specific battery voltage before buying.
Yes. Since your battery already needs to work hard to cover outages, adding solar charging reduces how much of that charging load falls on the grid, extending both savings and battery-friendly usage patterns.
Yes, as long as your charge controller’s maximum current rating has room to spare. Check this before adding more panels down the line.
Periodically clean dust off the panel surface, check wiring connections for corrosion, and monitor the charge controller’s display for any warning indicators, especially after monsoon season.
We hope you find this information useful, and please share it with your friends and relatives.
Also, consider following our Facebook and Twitter pages for regular updates.
Subscribe to our free newsletter so that you will get similar articles and regular updates directly in your Email.
Subscribe to be the first to learn about new information
Disclosure: If you follow our links to a retailer’s website and make a purchase, we will get an affiliate commission on some, but not all, of the items or services we promote. This will cause no price change for you.





I need to convert livguard 900 VA pure sine wave inverter & livguard 180 AH tubular battery into solar retrofit system. Pl guide me the best charge controller, solar panels with all details & cost. Thanking you
You can use two 180 W,12 V solar panels and a 40 A MPPT charge controller. Loom Solar’s 180-watt monocrystalline panel and UTL MPPT SMU 12V/24V 40-amp automatic solar charge controller are our recommended products.